

We are going to learn how to validate your forms using PHP and jQuery in both sides: client side (using javascript with jQuery) and server side (using PHP). It will be interesting to see how to use regular expressions to validate different kind of e-mails, passwords and more.
Introduction
As you know, we are asking you wich tutorials do you want to see in yensdesign and as i told you, you can send us more suggestions and feedback in our forums.
On of these suggestions is about how to validate forms in server side using PHP, so in this tutorial we will make use of PHP and jQuery to validate all fields in both sides:
- Client side: Using javascript with jQuery.
- Server side: Using PHP.
We will make use of regular expressions and if you don’t know about them, you will notice very soon their power. By the way, you can check out this source to learn more about regular expressions in different languages.
At the end of the tutorial, we will get a final real working example that will validate our fields with / without javascript enabled, but always making use of the server side validaton.
Let’s dive into the tutorial!
Step 1: First approach to the xHTML Layout
In this case we will create a simple HTML layout showing our form. In a first approach the HTML will look like this:
<!DOCTYPE html PUBLIC "-//W3C//DTD XHTML 1.0 Transitional//EN" "http://www.w3.org/TR/xhtml1/DTD/xhtml1-transitional.dtd">
<html xmlns="http://www.w3.org/1999/xhtml" dir="ltr">
<head>
	<meta http-equiv="Content-Type" content="text/html; charset=UTF-8" />
	<title>yensdesign.com - Validate Forms using PHP and jQuery</title>
	<link rel="stylesheet" href="css/general.css" type="text/css" media="screen" />
</head>
<body>
	<a id="logo" title="Go to yensdesign.com!" href="http://www.yensdesign.com"><img src="css/images/logo.jpg" alt="yensdesign.com" /></a>
	<div id="container">
		<h1>Registration process</h1>
			<div id="error">
				<ul>
					<li><strong>Invalid Name:</strong> We want names with more than 3 letters!</li>
					<li><strong>Invalid E-mail:</strong> Stop cowboy! Type a valid e-mail please :P</li>
					<li><strong>Passwords are invalid:</strong> Passwords doesn't match or are invalid!</li>
					<li><strong>Ivalid message:</strong> Type a message with at least with 10 letters</li>
				</ul>
			</div>
			<div id="error" class="valid">
				<ul>
					<li><strong>Congratulations!</strong> All fields are OK ;)</li>
				</ul>
			</div>

		<form method="post" id="customForm" action="">
			<div>
				<label for="name">Name</label>
				<input id="name" name="name" type="text" />
				<span id="nameInfo">What's your name?</span>
			</div>
			<div>
				<label for="email">E-mail</label>
				<input id="email" name="email" type="text" />
				<span id="emailInfo">Valid E-mail please, you will need it to log in!</span>
			</div>
			<div>
				<label for="pass1">Password</label>
				<input id="pass1" name="pass1" type="password" />
				<span id="pass1Info">At least 5 characters: letters, numbers and '_'</span>
			</div>
			<div>
				<label for="pass2">Confirm Password</label>
				<input id="pass2" name="pass2" type="password" />
				<span id="pass2Info">Confirm password</span>
			</div>
			<div>
				<label for="message">Message</label>
				<textarea id="message" name="message" cols="" rows=""></textarea>
			</div>
			<div>
				<input id="send" name="send" type="submit" value="Send" />
			</div>
		</form>
	</div>
	<script type="text/javascript" src="jquery.js"></script>
	<script type="text/javascript" src="validation.js"></script>
</body>
</html>
As you can see we have created all divisions that will appear (or not) in our tutorial. Some of these divisions won’t be visible as default, but we will add some conditionals in PHP and CSS to get this. So these are the divisions:
- #container: contains all divisions
- #error: contains a list of possible errors after submitting the form
- #error.valid: contains the “congratulations phrase” if all it’s OK
- #customForm: contains our form


So now we have our xHTML layout ready let’s add some style with CSS.
Step 2: Adding style with CSS
It will be fast guys, just take a look at the general.css code:
@CHARSET "UTF-8";
/******* GENERAL RESET *******/
html, body, div, span, applet, object, iframe, h1, h2, h3, h4, h5, h6, p, blockquote, pre, a, abbr, acronym, address, big, cite, code, del, dfn, em,
font, img, ins, kbd, q, s, samp, small, strike, strong, sub, sup, tt, var, dl, dt, dd, ol, ul, li, fieldset, form, label, legend, table, caption, tbody,
 tfoot, thead, tr, th, td {
border:0pt none;
font-family:inherit;
font-size: 100%;
font-style:inherit;
font-weight:inherit;
margin:0pt;
padding:0pt;
vertical-align:baseline;
}
body{
	background: #fff;
	line-height:14px;
	font-size: 12px;
	font-family: Arial,  Verdana, Helvetica, sans-serif;
	margin:0pt;
	cursor:default;
	overflow: hidden;
}
html,body{
	height:100%;
	text-align: center;
}
.clear{
	clear: both;
	height: 0;
	visibility: hidden;
	display: block;
}
a{
	text-decoration: none;
}
strong{
	font-weight: 700;
}
/******* GENERAL RESET *******/
h1{
	font-weight: 700;
	font-size: 18px;
	line-height: 1.2em;
	border-bottom: 1px dotted #6b9ef1;
	color: #5f95ef;
	margin-bottom: 1em;
}
/******* LOGO *******/
#logo{
	margin-top: 1em;
	display: block;
}
/******* /LOGO  *******/
/******* CONTAINER *******/
#container{
	width: 600px;
	margin: 40px auto;
	text-align: left;
}
/******* /CONTAINER *******/
/******* FORM *******/
#customForm{
	padding: 0 10px 10px;
}
#customForm label{
	display: block;
	color: #797979;
	font-weight: 700;
	line-height: 1.4em;
}
#customForm input{
	width: 220px;
	padding: 6px;
	color: #949494;
	font-family: Arial,  Verdana, Helvetica, sans-serif;
	font-size: 11px;
	border: 1px solid #cecece;
}
#customForm input.error{
	background: #f8dbdb;
	border-color: #e77776;
}
#customForm textarea{
	width: 550px;
	height: 80px;
	padding: 6px;
	color: #adaeae;
	font-family: Arial,  Verdana, Helvetica, sans-serif;
	font-style: italic;
	font-size: 12px;
	border: 1px solid #cecece;
}
#customForm textarea.error{
	background: #f8dbdb;
	border-color: #e77776;
}
#customForm div{
	margin-bottom: 15px;
}
#customForm div span{
	margin-left: 10px;
	color: #b1b1b1;
	font-size: 11px;
	font-style: italic;
}
#customForm div span.error{
	color: #e46c6e;
}
#customForm #send{
	background: #6f9ff1;
	color: #fff;
	font-weight: 700;
	font-style: normal;
	border: 0;
	cursor: pointer;
}
#customForm #send:hover{
	background: #79a7f1;
}
#error{
	margin-bottom: 20px;
	border: 1px solid #efefef;
}
#error ul{
	list-style: square;
	padding: 5px;
	font-size: 11px;
}
#error ul li{
	list-style-position: inside;
	line-height: 1.6em;
}
#error ul li strong{
	color: #e46c6d;
}
#error.valid ul li strong{
	color: #93d72e;
}
/******* /FORM *******/
As always we make use of our cool CSS reset snippet and add some interesting parts to the specific tutorial.
Just notice that we have defined some .error classes that we will use in the jQuery part to make our tutorial a little more cool and friendly user
Next part, the javascript validation!
Step 3: Validation in the client side with jQuery
Yeah guys, because it could not be otherwise we will use jQuery to make the validation part in the client side. We will add / remove some .error classes to make our form a little more intuitive for the final user.
So first of all, remember that all the following code will be in the $(document).ready() of jQuery and all will be a part of the javascript file named validation.js (original, uh?).
So let’s save references to some DOM elements that we will often:
//global vars
var form = $("#customForm");
var name = $("#name");
var nameInfo = $("#nameInfo");
var email = $("#email");
var emailInfo = $("#emailInfo");
var pass1 = $("#pass1");
var pass1Info = $("#pass1Info");
var pass2 = $("#pass2");
var pass2Info = $("#pass2Info");
var message = $("#message");
As you may notice, all references are form related.
Now let’s define our validation functions that will help us in the validation process:
- validateEmail(): we only allow valid emails!
- validateName(): we only allow names with more than 3 letters
- validatePass1(): we only allow passwords with at least 5 characters
- validatePass2(): we only allow it if passwords are equal
- validateMessage(): we only messages with more than 10 letters
function validateName(){
	//if it's NOT valid
	if(name.val().length < 4){
		name.addClass("error");
		nameInfo.text("We want names with more than 3 letters!");
		nameInfo.addClass("error");
		return false;
	}
	//if it's valid
	else{
		name.removeClass("error");
		nameInfo.text("What's your name?");
		nameInfo.removeClass("error");
		return true;
	}
}
function validatePass1(){
	var a = $("#password1");
	var b = $("#password2");

	//it's NOT valid
	if(pass1.val().length <5){
		pass1.addClass("error");
		pass1Info.text("Ey! Remember: At least 5 characters: letters, numbers and '_'");
		pass1Info.addClass("error");
		return false;
	}
	//it's valid
	else{
		pass1.removeClass("error");
		pass1Info.text("At least 5 characters: letters, numbers and '_'");
		pass1Info.removeClass("error");
		validatePass2();
		return true;
	}
}
function validatePass2(){
	var a = $("#password1");
	var b = $("#password2");
	//are NOT valid
	if( pass1.val() != pass2.val() ){
		pass2.addClass("error");
		pass2Info.text("Passwords doesn't match!");
		pass2Info.addClass("error");
		return false;
	}
	//are valid
	else{
		pass2.removeClass("error");
		pass2Info.text("Confirm password");
		pass2Info.removeClass("error");
		return true;
	}
}
function validateMessage(){
	//it's NOT valid
	if(message.val().length < 10){
		message.addClass("error");
		return false;
	}
	//it's valid
	else{
		message.removeClass("error");
		return true;
	}
}
As you can see, we are adding and removing .error classes and changing text values if needed to show the user what fields are wrong.
Now we have defined all validation functions, we only need to manage events. Here you have what we are going to do:
- Validate the name field in: blur and keyup events.
- Validate the email field in: blur event.
- Validate the password fields in: blur and keyup events.
- Validate the message field in: blur, and keyup event.
- Validate all fields in: submit form event.
Therefore the code would be:
//On blur
name.blur(validateName);
email.blur(validateEmail);
pass1.blur(validatePass1);
pass2.blur(validatePass2);
//On key press
name.keyup(validateName);
pass1.keyup(validatePass1);
pass2.keyup(validatePass2);
message.keyup(validateMessage);
//On Submitting
form.submit(function(){
if(validateName() &amp; validateEmail() &amp; validatePass1() &amp; validatePass2() &amp; validateMessage())
return true
else
return false;
});
As you can see, it’s very easy to control whatever we want by using jQuery and some functions. So now that we have done the cliend site,let’s move to the server side!
Step 4: Validation in the server side with PHP
Now that we have the client side done, let’s use the power of PHP to complete our tutorial.
Some of you may think that we don’t need the server side validation but it’s a big error thinking about it. Remember that we can’t trust in the client side. In example: users can disable javascript in their browsers and send us undesired values.
So first of all we must create a new .php file named validation.php that will contains our validation functions written in PHP:
<?php
function validateName($name){
//if it's NOT valid
if(strlen($name) < 4)
return false;
//if it's valid
else
return true;
}
function validateEmail($email){
return ereg("^[a-zA-Z0-9]+[a-zA-Z0-9_-]+@[a-zA-Z0-9]+[a-zA-Z0-9.-]+[a-zA-Z0-9]+.[a-z]{2,4}$", $email);
}
function validatePasswords($pass1, $pass2) {
//if DOESN'T MATCH
if(strpos($pass1, ' ') !== false)
return false;
//if are valid
return $pass1 == $pass2 &amp;&amp; strlen($pass1) > 5;
}
function validateMessage($message){
//if it's NOT valid
if(strlen($message) < 10)
return false;
//if it's valid
else
return true;
}
?>
As you can see we have defined 4 functions:
- validateName(): checks if name has at least 4 letters
- validateEmail(): checks if email is valid
- validatePasswords(): checks if passwords are equal and have at least 5 letters
- validateMessage(): checks if message has at least 10 letters
It’s almost done guys, we only need to add some conditionals to our index.php. If you remember, we said that we are going to add some conditionals in the PHP, so it’s time to do that:
- We will display #error division only if there are at least one error.
- We will display #error.valid division only if all fields are OK.
So here you have the final index.php layout:
<?php
require_once("validation.php");
?>
<!DOCTYPE html PUBLIC "-//W3C//DTD XHTML 1.0 Transitional//EN" "http://www.w3.org/TR/xhtml1/DTD/xhtml1-transitional.dtd">
<html xmlns="http://www.w3.org/1999/xhtml" dir="ltr">
<head>
<meta http-equiv="Content-Type" content="text/html; charset=UTF-8" />
<title>yensdesign.com - Validate Forms using PHP and jQuery</title>
<link rel="stylesheet" href="css/general.css" type="text/css" media="screen" />
</head>
<body>
<a id="logo" title="Go to yensdesign.com!" href="http://www.yensdesign.com"><img src="css/images/logo.jpg" alt="yensdesign.com" /></a>
<div id="container">
<h1>Registration process</h1>
<?if( isset($_POST['send']) &amp;amp;amp;amp;amp;amp;amp;amp;&amp;amp;amp;amp;amp;amp;amp;amp; (!validateName($_POST['name']) || !validateEmail($_POST['email']) || !validatePasswords($_POST['pass1'], $_POST['pass2']) || !validateMessage($_POST['message']) ) ):?>
<div id="error">
<ul>
<?if(!validateName($_POST['name'])):?>
<li><strong>Invalid Name:</strong> We want names with more than 3 letters!</li>
<?endif?>
<?if(!validateEmail($_POST['email'])):?>
<li><strong>Invalid E-mail:</strong> Stop cowboy! Type a valid e-mail please :P</li>
<?endif?>
<?if(!validatePasswords($_POST['pass1'], $_POST['pass2'])):?>
<li><strong>Passwords are invalid:</strong> Passwords doesn't match or are invalid!</li>
<?endif?>
<?if(!validateMessage($_POST['message'])):?>
<li><strong>Ivalid message:</strong> Type a message with at least with 10 letters</li>
<?endif?>
</ul>
</div>
<?elseif(isset($_POST['send'])):?>
<div id="error" class="valid">
<ul>
<li><strong>Congratulations!</strong> All fields are OK ;)</li>
</ul>
</div>
<?endif?>
<form method="post" id="customForm" action="">
<div>
<label for="name">Name</label>
<input id="name" name="name" type="text" />
<span id="nameInfo">What's your name?</span>
</div>
<div>
<label for="email">E-mail</label>
<input id="email" name="email" type="text" />
<span id="emailInfo">Valid E-mail please, you will need it to log in!</span>
</div>
<div>
<label for="pass1">Password</label>
<input id="pass1" name="pass1" type="password" />
<span id="pass1Info">At least 5 characters: letters, numbers and '_'</span>
</div>
<div>
<label for="pass2">Confirm Password</label>
<input id="pass2" name="pass2" type="password" />
<span id="pass2Info">Confirm password</span>
</div>
<div>
<label for="message">Message</label>
<textarea id="message" name="message" cols="" rows=""></textarea>
</div>
<div>
<input id="send" name="send" type="submit" value="Send" />
</div>
</form>
</div>
<script type="text/javascript" src="jquery.js"></script>
<script type="text/javascript" src="validation.js"></script>
</body>
</html>
As you can see we have included the validation.php file before call our validation functions and added some calls to our validation functions to check fields when form is submited.
We have used short notation PHP in conditionals to keep the HTML cleaner and easier to read.
We are showing errors / “congratulations phrase” as needed and now you only need to know what are you doing to do with thisvalidated values ![]()
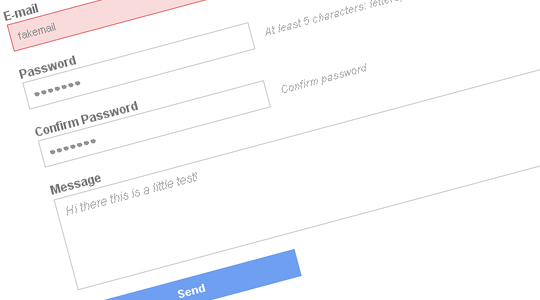
Step 5: Testing our Validated Form!
That’s all guys, I hope you find it useful and use this tutorial to improve a little more your websites.
Remember that if you want to try the server side, you need to disable the javascript in your web browser. In Firefox it’s in Tools > Options > Content uncheck the “Enable Javascript” checkbox.